8 Tips for Creating Effective Word Walls in Secondary
English, math, science, history, art, physical education – No matter what the content area, students have to be able to speak the language of the class. Each subject has its own set of unique terms students need to master in order to be able to fully comprehend important skills.
While there are many ways to scaffold literacy in ELA and other content area classes, word walls have been proven to work. They are especially helpful for English Learners and struggling readers, but they certainly don’t hurt students who are proficient.
Word walls are most valuable when students take ownership. Speaking from experience, it’s really hard for a word wall to be effective when its illegible. Plus, students don’t always understand how to design pieces for a word wall so that they are truly a valuable reference. There are two ways to address this concern:
- Teach students how to create content for a word wall.
- Have students contribute all of the information, but the teacher can be in charge of creating the actual display piece.
If you’re interested in using a word wall in your classroom, keep reading for some specific tips that will help you to maximize its effectiveness.
WORD WALLS AS LITERACY SUPPORT
Tip 1
Limit the number of words. I would suggest not adding more than five to ten words per week to your word wall. It’s more beneficial for students to have meaningful and repeated exposure to fewer words per week than to be drilled on twenty or more words at a time, most of which they will forget soon after the quiz.
Tip 2
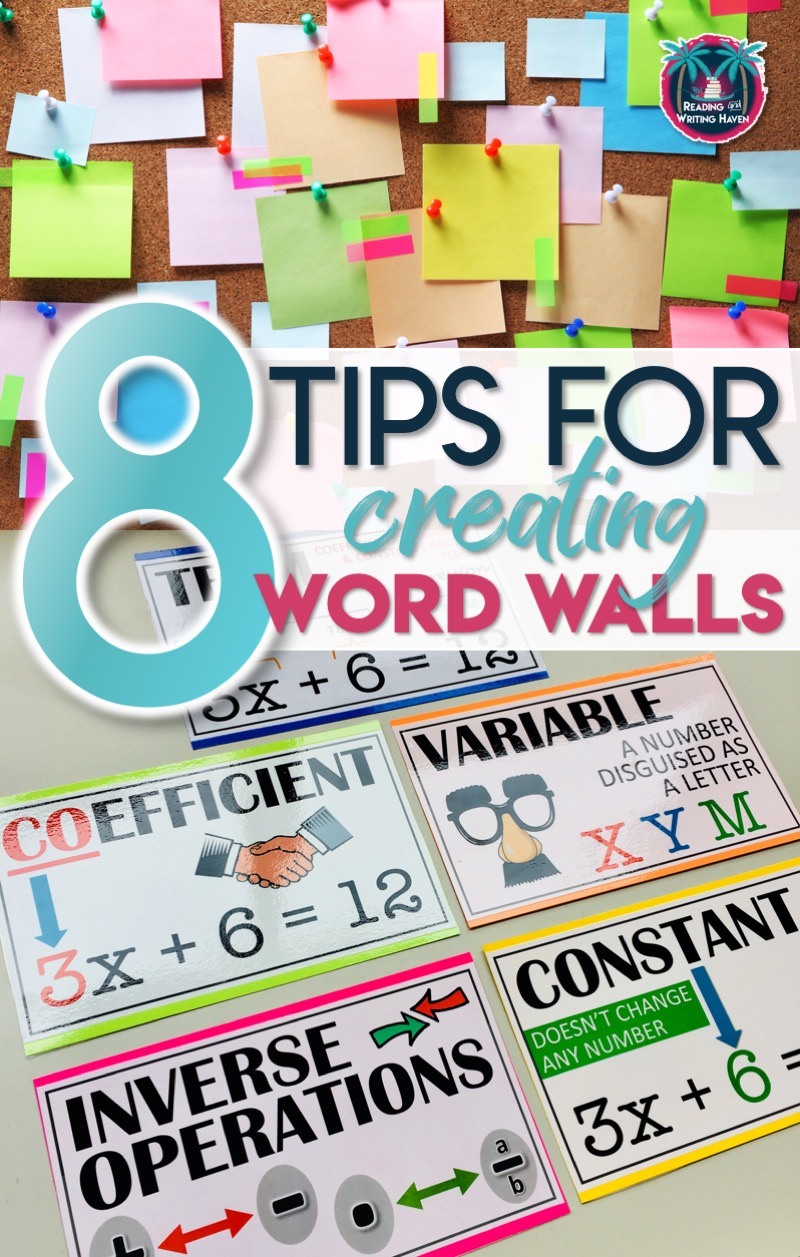
Add color. Color is a brain-based learning approach. Using color meaningfully heightens our awareness of information by drawing our attention to it. Incorporating color in word walls helps students to transfer the information from short-term memory to permanent memory storage.
Tip 3
Make sure the font is big enough that students will be able to read it from anywhere in the room. Sometimes, you just have to play with the document to see if what you have will work. Before creating a masterpiece to add to a word wall, print out the word by itself, put it on the wall, ceiling, or location of choice, and then sit in various places in your classroom. Will students be able to read it no matter where they are? That’s the goal.
Tip 4
Ask yourself, What will students find confusing about this word, and how can I scaffold their understanding? Simply typing a word on a document is not an effective approach to a word wall. If you are creating the word wall yourself or making elements that students have brainstormed, don’t forget to add picture associations, memorable examples, or short definitions in addition to the word. Definitions can be straightforward or humorous. For instance, a variable can be defined as “a number disguised as a letter.”
Tip 5
Protect all of the hard work that you and your students collectively invested in the word wall. Laminate the pieces and back them with cardstock. Plus, laminating and backing helps them to be more sturdy and to stand out more when they are displayed on the wall.
Tip 6
Hang words in a place students will always see them. If your students face the front of the room 80% of the time, why would you hang the word wall in the back? Think about the easiest reference point for the students, and if you have to move posters or lamps to place the words in the most convenient spot, so be it.
Tip 7
Make them interactive. There are so many ways to involve students!
- For example, you can type up the word and a brief definition. Students can then create a picture association or write an example on a smaller piece of paper (Post-It, cardstock, Astrobright – whatever you choose), and they can place their work on the wall around or under the word itself.
- You can also host competitions. See which class period can collaboratively design the best piece for a new word.
- Divide students into groups, and have group one write the word (maybe graffiti style or symbolically), ask group two to draw a picture, have group three write down related words, and so on.
- Leave space between the words, and throughout the year, have students add examples they find that relate to the words on the wall.
Those are a just a handful of ideas.
Tip 8
Lastly, don’t forget to talk about your word wall often with students. Whenever you are using a word in your speech or a student asks a question related to a word on the wall, make an effort to go stand by the word, point it out to students, review the term, and talk about the words as much as possible. This repetition will help. Also, referring to the word wall reminds students that it’s there to help them.
Those are some of my favorite tips for creating word walls in secondary. What would you add? Leave your thoughts in the comments. We’d love to hear from you!
Hey! Are you a math teacher, you can download this PDF with domain-specific vocabulary terms for teaching algebra concepts.
FURTHER READING:
How to Teach Vocabulary: A Creative Manual for Secondary
RELATED RESOURCE:
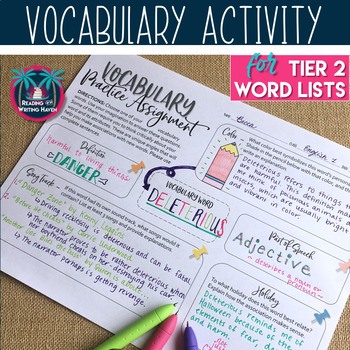
This free vocabulary activity will complement almost any word list in almost any class or subject area. It’s intended to be used in secondary classrooms and features brain-based learning and differentiated learning approaches. Click the image to download for use.