Easy Ways to Organize a Virtual Classroom
Have you ever had so many tabs open at once that you can’t even tell which tab is which? Yeah, me neither (cough). No one wants their brain to feel like it has a tab issue. Yet, that’s what distance learning can seem like for both students and teachers. COVID-19 put most people into a state of emergency. It’s kind of hard to transform from face-to-face instruction to an online classroom overnight. But, many of us did! Going forward, however, we need a better plan to organize a virtual classroom for both students and teachers.
We can organize learning experiences to reduce confusion and save time for everyone involved. This post offers some ideas for establishing routines and organizing work in a digital classroom.
ESTABLISHING ROUTINES
Checking In
During a traditional school year, we teach students the routine of checking (usually the board) for information like…
- supplies they need out on their desk
- the day’s agenda
- the bell ringer
- homework and due dates
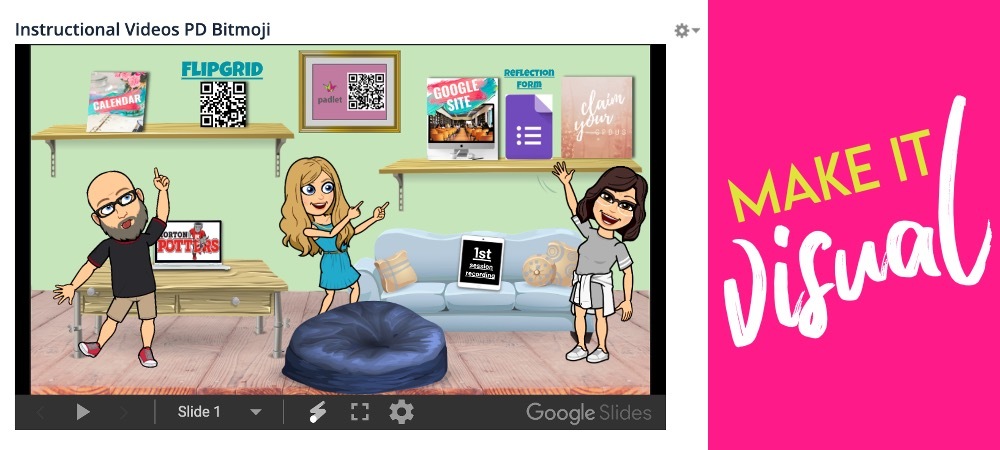
An online classroom needs the same cultivation. We can start by helping students develop a habit of checking in at the same location each day. Whether it’s Schoology, Google Classroom, or a fun Bitmoji classroom, we need to establish the routine of starting in the same place regularly.
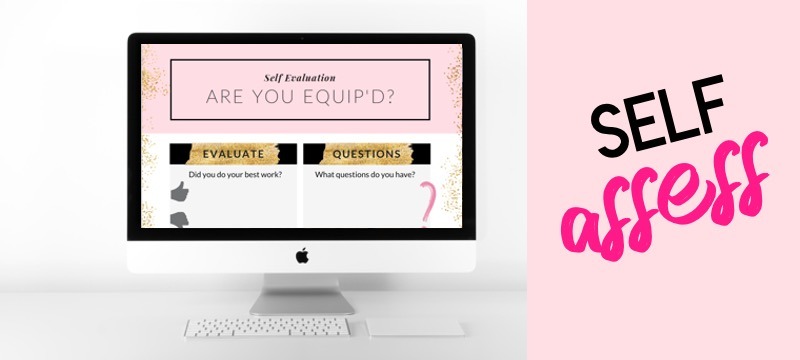
Because it can be taxing to read a lot of text on a screen, the more visuals we can use to organize the day’s learning for students, the better! It’s relatively simple to insert a few images on a slide (as pictured above), and it will reduce distractions for students when they’re trying to focus on their work.
Finding Assignments
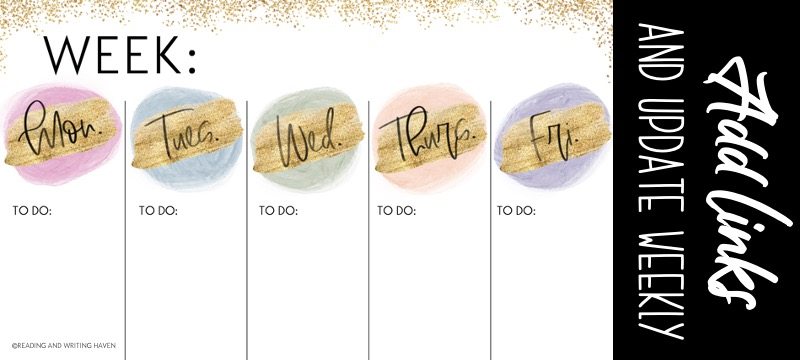
Scrolling in general can be annoying, but having to scroll endlessly to find past assignment details is the worst. Instead of posting assignment details in the Google Classroom stream, it can help to create an ongoing calendar for students. The calendar can be linked to the learning management system.
On the calendar, we can add links for assignment details, videos, suggested pacing, due dates, and turn-in locations. The fewer places students have to check to get organized with their work, the more efficient the process is for everyone.
I like organizing the calendar weekly. If you add a separate slide for each day, the document gets to be pretty big, which makes it harder for students to find what they need. And, with a whole month, I don’t have enough room to add my links and reminders. (You can grab this weekly calendar here!)
Communicating with Students
Thousands of emails. What used to be frequent, daily face-to-face conversations are overwhelming when they turn into a congested inbox. So, we can organize online learning by teaching students how to ask for help.
First, decide on your preferred method of communication.
Do you want them to email you? If so, consider teaching students to use a specific subject line. For example: 1st Hour Question on Informative Essay. A clear subject line helps us to prioritize when skimming our inboxes.
Email etiquette is always one of my first writing lessons of the year. Teaching students how to email professionally (a real-world writing lesson) saves everyone time and frustration in the long run.
But, there are other options!
Keep a running doc where students can ask questions, and you can respond to them. Add headings and activate the outline feature on Google Docs so that students can quickly scan to see if their question has already been asked before posing it a second time.
Flipgrid can work in a similar fashion. Invite students to post questions on a board, but watch the other frequently asked questions first to make sure theirs has not already been discussed. Padlet is another similar option where students can quickly post a question and even include a photo of their work for feedback.
Turning in Work
As much as possible, it helps to keep assignment due dates and turn in locations consistent. In a digital classroom, it can be easy to lose track of time and forget about an assignment. Without a physical paper to remind us, it can very much be “out of sight, out of mind.”
But, if students know they have work due by 5 p.m. every day or every Friday, and there is a regular location to turn that work in, they will be more likely to remember.
And, we have to intentionally teach students the process of how to submit work on different platforms. One way to do that is to record a very short tutorial video and put it on our main platform. That way, if students have issues, they can just watch the tutorial instead of emailing or not submitting.
Parent-Teacher Communication
If your inbox is full of parent-teacher communication, and trying to track all of the touchpoints is getting cumbersome, I have a practical solution.
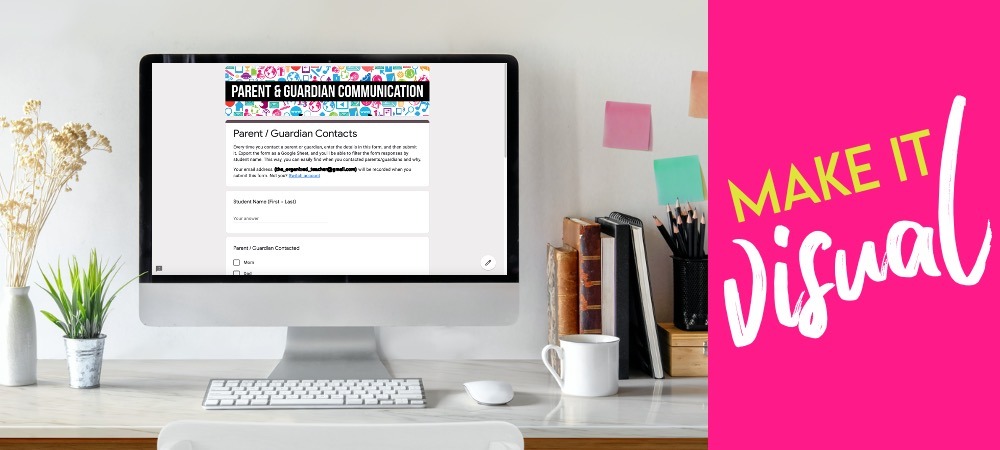
Create a short Google Form. Fill it out every time you touch base with a parent or guardian. You can bookmark it or pin it as a tab that will open every time you turn on your device to make it more convenient. In the form, record data like the student’s name, the person you contacted, and the reason for the communication. Fill out the form as you are on the phone or as soon as you finish an email. Taking the extra 30 seconds to enter details about the contact in this way will help you to be more efficient with tracking the who, what, when, and why of parent communication.
To easily sort the data, export Google Form results into an excel spreadsheet. From there, you can create filters or organize columns by student name, which will cause all of the contacts you’ve made for one student to show up clumped together.
Streamlining this communication will help you to feel more prepared to conduct parent-teacher conferences. Plus, you’ll have organized evidence of communication to show your evaluator. And, you won’t have to spend hours searching your sent folder to track down details.
Make a free copy of my parent contact Google Form here.
ORGANIZING WORK
Organizing Learning Activities
Regularity without Ordinary
Students can get into a rhythm if we organize online learning to include some predictable elements. In college, I remember a couple different ways professors made our once a week meetings feel more regular. One was through weekly discussion posts (those I did not love!) and the other was through weekly journal responses to reading (which I enjoyed a lot!).
Part of our job as teachers is to find out how our students like to learn and interact with new information. Then, we need to build in some regularity to those activities with online learning.
Will you use an online bell ringer? For instance, maybe they will complete one digital vocabulary activity a day.
Will students be encouraged to read a book of their choice every day? If so, they’ll need to work on developing a reading habit and have a variety of engaging options for responding to their reading. Digital one pagers, journal responses, social media activities, literary element analysis…we can incorporate some predictability and critical thinking while providing choice to eliminate anything mundane.
Visual Attention Grabbers
And, IMPORTANT! – Where will students locate these activities? When we use the same organizational system for students who are in person as well as those who are at home, there will be less confusion. If we use a white board to post our agenda in person but a learning management system to post assignments remotely, students probably won’t know where to look when they’re at home.
One option for housing daily activities is to create something visual that will catch students’ attention when they log into the platform. Whether you have color-coded folders, a Bitmoji classroom linked to your daily agenda slides, or digital buttons, visuals are more effective than words.
Providing Video Lessons
I’ve flipped my classroom for many years, and one thing I notice about doing so is that it frees up so much class time for me to work with students. Moving into a digital classroom environment is similar in that video lessons allow us to differentiate more easily. Those who need to re-watch can. And, we can make short enrichment lessons for students who need a challenge.
It can be overwhelming for students to try to write without being in the same room as a teacher. Video lessons are a way for us to bridge the gap. We can incorporate lessons on grammar, fluency, and ideas. Plus, we can model our thinking and writing process for students.
Learning to Self Assess
One of the most critical aspects of organizing online learning for me is to find a way to get feedback from students regarding how they are doing, what they are learning, and what questions they have. It’s imperative that we teach students to self-assess. It’s part of the culture we create.
I think we can do this in many ways, but one of them is through conversations. We need to show students why it matters…that their voice and input help shape the learning environment!
We can also model this process for students. As we read and write, we can point out different things, like…
- I am not completely confident that I understand what this means. I need to do some more work to find out. Maybe I could ask a friend or look it up online.
- I love the way my essay turned out, but I wasn’t able to do it on my own. Maybe since I needed help, that means I’m still developing these skills. I have more work to do!
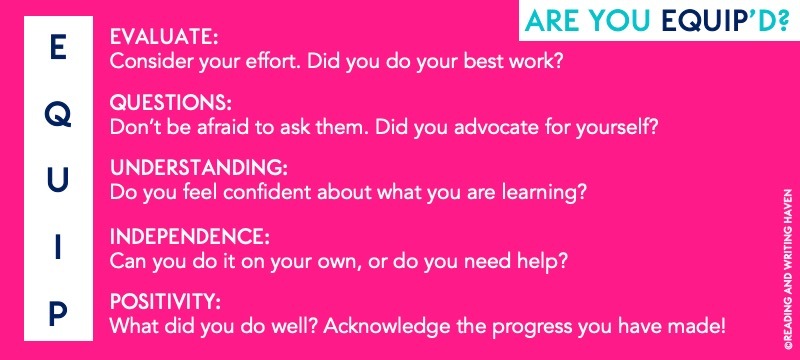
A fun acronym for self-evaluation!
And, we can share helpful tips with students. Acronyms can be powerful. In order to self-assess, we need to be EQUIP-ed.
- E – Evaluate? Consider your effort. Did you do your best on this work?
- Q – Questions? Don’t be afraid to ask them. Did you advocate for yourself?
- U – Understanding? Do you feel confident about what you are learning? Can you connect it to life or other school lessons? Could you teach someone else about it?
- I – Independence? Did you need help with this assignment, or were you able to do it independently?
- P – Positivity! What are your strengths? What did you do well? Notice the progress you have made. Give yourself some praise. You are growing!
Download a free student self-reflection questionnaire for this fun acronym here.
Self-assessing during online class meetings…
With synchronous meetings, we can organize online learning by streamlining lessons and discussions with quick formative checks. Have students hold up emoji cards or colored papers (red, green, yellow) to indicate clarity, confusion, or uncertainty. Many other symbols can be used as well. Think: thumbs up, down, or a question mark.
Digital learning doesn’t have to feel like you’re standing in the middle of a whirlwind. As educators, whenever we are faced with a new challenge, we learn from what works, and we fix what doesn’t moving forward. I hope these lessons I’ve learned will help you organize a virtual classroom for students, teachers, and parents so that the process is more efficient and manageable for everyone.
In the mood to organize more? Read Language Arts Classroom’s post in which she offers some additional suggestions for designing a digital classroom.
READ NEXT:
- 3 Essential Digital Skills to Model in Secondary
- How to Assign Digital One Pagers
- Making the Most of eLearning Days
- Classroom Setup Ideas for Secondary

