How to Make the Most of eLearning Days
School closings can feel a lot like being stuck in the middle of a whirlwind. Remote learning is becoming more common, but that doesn’t mean that planning for eLearning days is an easy task. All the decisions, unknowns, and what-ifs can be overwhelming.
After the governor recently announced that all schools in the state have mandatory closings due to the coronavirus, I grabbed my coffee and laptop, and I started planning. What does meaningful eLearning look like? The last thing I would want is to assign busy work or packets of worksheets that drive students further away from learning.
For many, one of the most confusing aspects of planning for remote learning is the unknown. We don’t always know how to plan meaningful remote learning or what the kinks might be. And, I think that’s okay! Why not treat remote learning as an opportunity to elevate learning? To connect to students’ lives? To draw in some curiosity and creativity? In education, there’s always room for trying new things, for learning, and for reflecting so that we know more going forward.
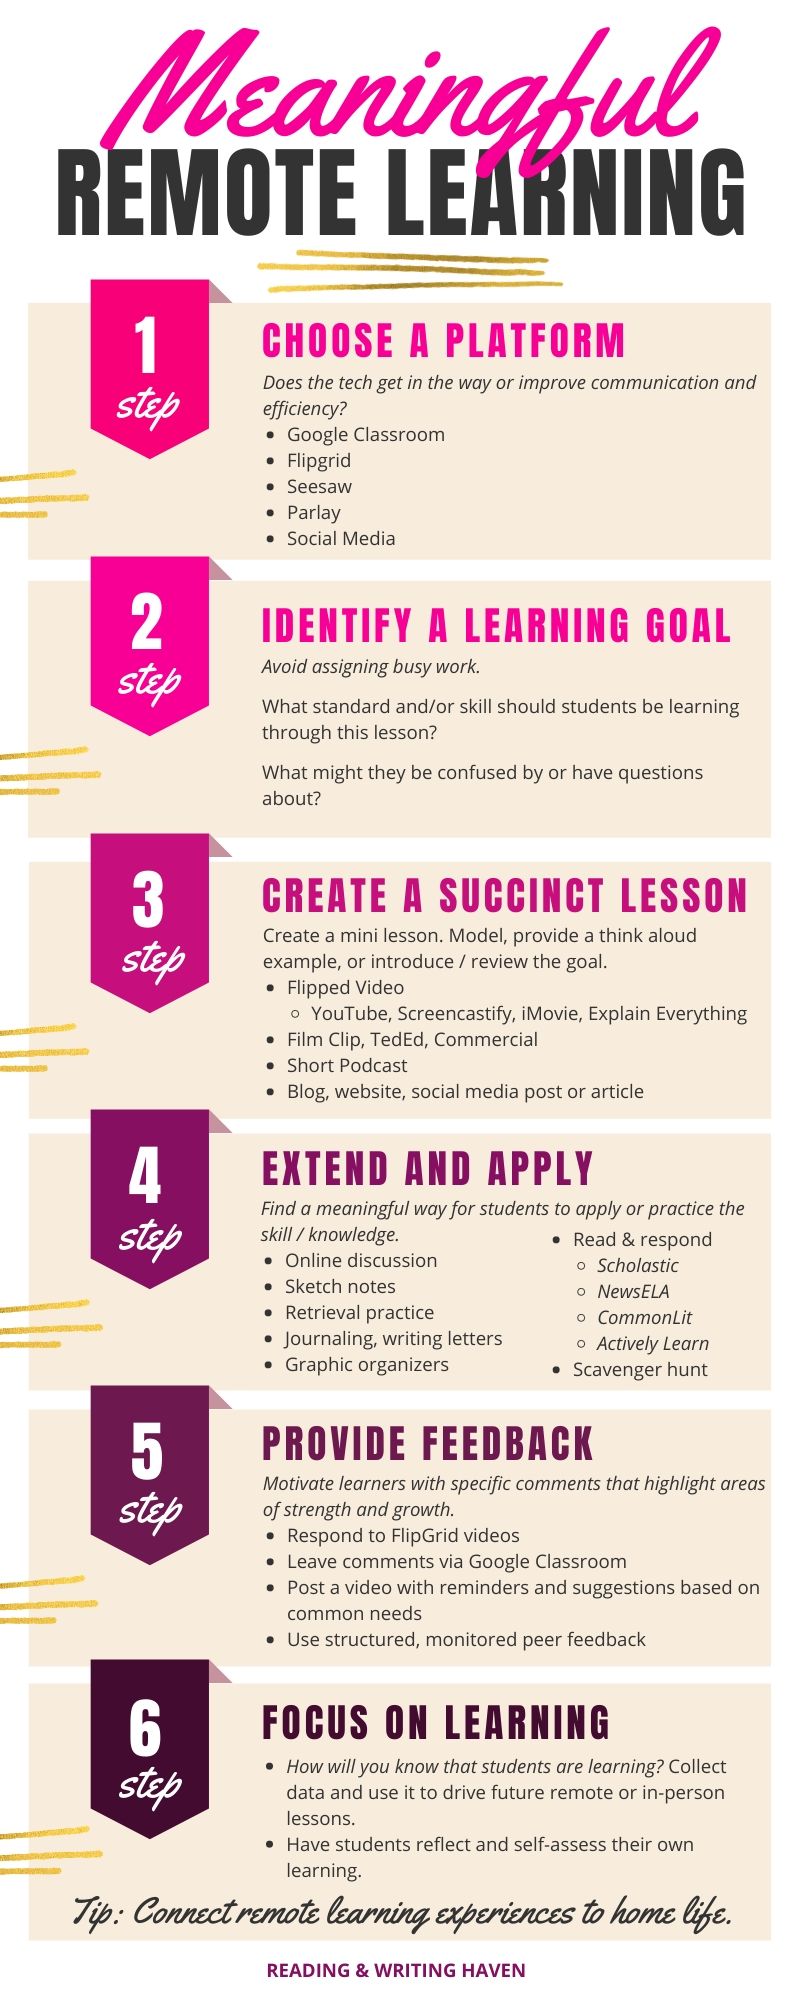
STEP 1: CHOOSE A PLATFORM FOR eLEARNING
The first step to creating an effective eLearning experience is to choose a platform. Keep in mind that parents and guardians don’t always know how to help students navigate new tech, so choosing a platform that students know really well already or one that has a small learning curve is important. Also, consider sending home directions for access in multiple formats (step-by-step directions and a video tutorial, for example).
To reduce confusion and frustration, I recommend sticking with one main platform rather than trying to switch it up for variety. Here are some popular options:
SeeSaw: Seesaw allows students to post images, videos, and files. They can also interact with one another’s posts in a social-media style fashion, and you can adjust the settings so that the comments have to be approved before they appear in the class feed.
Flipgrid: Flipgrid is a fun way to talk back and forth with students. Basically, it’s a grid where students record short video clips. They can also draw on a whiteboard or blackboard and embed images into their videos. It’s a user-friendly platform in which students can verbally respond to one another’s clips.
Google Classroom: Most students are familiar with Google Classroom. If your school uses it frequently, it might be the simplest way to collect work. Use Forms to gather “exit ticket” data after an eLearning lesson, or have students contribute to a collaborative slides presentation.
Other platforms obviously exist, too. Some schools use Class Dojo because of the convenience with parent communication. Schoology and Canva are more advanced learning management systems, and Clever is a convenient platform to house different digital resources.
STEP 2: IDENTIFY A LEARNING GOAL
With eLearning, it can be easy to fall into the trap of assigning busy work. While it might not feel like busy work to us, the way students and parents perceive the work at home may be different.
If a student is completing work that is not challenging for them just to be doing something, it usually feels like busy work. And, if it feels to them like a bunch of activities (they are just doing stuff) with no clear learning goal, it’s busy work.
To avoid this pitfall, it helps to clearly identify and frame the learning target for students.
For example, if we are having them review comma rules, we can explain that the learning target is for them to move further along on the learning progression by analyzing how authors are using commas in their independent reading books and applying those same styles to their independent writing.
If students are going to be writing and reading to increase volume and stamina, increase motivation by providing them with some quick research to support the benefit and the why.
We can ask ourselves:
- What standard and/or skill should students be learning through this remote learning lesson?
- What might they be confused by or have questions about that I can address in advance?
STEP 3: CREATE A SUCCINCT e-LEARNING LESSON
e-Learning doesn’t always require a mini lesson, but five to ten minutes of direct instruction from the teacher can help provide direction. If the task doesn’t require explicit instruction, we can record ourselves framing the task…explaining the what, the why, and how students will receive feedback. Direct instruction can last longer with older students, and it can also be extended if it’s chunked to include synchronous social interaction or skill application.
It’s simple to use programs like Quicktime, YouTube (just make them unlisted, if you prefer), Screencastify, iMovie, Explain Everything, and Powtoon to create and house instructional videos.
Use instructional videos with eLearning to…
- Model and think aloud (a window into what a reader or writer thinks when applying a certain skill)
- Introduce a goal (using context clues to identify the meanings of unknown words in independent reading)
- Review the instructions (show your screen and provide an example of what students should be doing)
- Address misconceptions (anticipate questions or frustrations students will have and talk about them)
We can also use things like TedEd, podcasts, websites, and social media platforms (live videos!) to engage students in mini lesson style introductions to eLearning lessons.
Note: Lesson material needs to be created to SUCCINCTLY fit on a student device. If too much scrolling or small print is involved, students may just check out. We need to chunk the information neatly and purposefully.
STEP 4: EXTEND AND APPLY
After students understand the skill or concept, it’s important to give them meaningful practice opportunities. With eLearning, relevance and engagement are just as important, if not more-so, than when we are together in the classroom.
Meaningful remote learning activities could look like…
- digital one pagers
- online discussions
- sketch notes or one pagers as a response to a lesson
- retrieval practice
- journaling
- writing letters or emails
- graphic organizers to process learning
- scavenger hunts
- reading high-interest texts and applying a skill
- creating social media posts
- using vocabulary in writing
- reading high-interest texts to practice a strategy (CommonLit, NewsELA, Scholastic Scope, and Actively Learn are a great place to begin)
Whenever possible, if we can connect the tasks we are asking students to complete to their lives, their homes, and what is relevant to their world, we will see more engagement.
We should also be respectful of the time we are asking students to spend on their learning.
If we design a task that we estimate will take 15 minutes to complete on top of a 5 to 10 minute mini lesson, they are already up to almost 30 minutes of learning, just for one class. For older students, I just don’t think it’s reasonable to ask them to sit in front of a device for six hours a day. Perhaps one lesson and the application or extension could be stretched out over a couple days, which would also allow more time for Step 5, which is meaningful feedback.
STEP 5: PROVIDE FEEDBACK
When students are learning from home, they still want to know we care about their learning needs. We can motivate learners with specific comments that highlight areas of strength and growth.
However, it has to be in a way that is manageable for us. When students are working remotely, that often means teachers are as well. If you’re a teacher with a busy household like me, that’s all the more reason to be selective with how you’ll offer feedback.
Some options…
- Respond to FlipGrid videos
- Talk with students in a Google Meet or another synchronous platform
- Post a video with reminders and suggestions based on common needs
- Use peer feedback, but provide structure, model it first, and monitor it
- Use self-grading Google Forms or programs that provide immediate feedback for learners
- Post a question in Classroom and ask students to specifically identify what they want feedback on
It’s easier to stay on top of feedback when I check in on the work periodically throughout the day rather than doing it in one batch at night. Digital “stacks” of paper can be overwhelming, but if you bite off bite-size chunks in between lesson planning, feeding your own family, and walking the dog, it’s manageable.
STEP 5: FOCUS ON LEARNING
Sometimes we can get lost and overwhelmed in the plethora of free resources, shared Google Drive folders, and sheer number of possibilities for what we could do with remote learning. It’s amazing that companies, educators, and others are so generous to share, share, share. But, we have to be able to process all of it.
The first step to focusing on learning is to find a small group of people you can plan with, if possible. Establish your purpose: What are students supposed to learn, and how will you know if it is happening?
Once you have your plans ready and students are engaging in eLearning days, collect data and use it to drive future remote or in-person lessons. Consider turning traditional exit tickets into self-assessments. Ask students to reflect on their learning after they complete a lesson, and maybe that is what you use to assess the needs for subsequent eLearning lessons.
If you’re planning on having students read and write daily during eLearning to increase volume, enjoyment, or stamina, GREAT! But, we can also add an element of instruction to these experiences. Use it to reinforce standards, bring in some retrieval practice to review topics already taught, and to keep students thinking critically.
CONSIDER THE TIME FRAME
Successful eLearning experiences don’t always have a one day turn around. Consider showing students a learning target and asking them to identify how they would like to show proficiency with that skill.
For example, if we want them to understand kinetic and potential energy, we can give them a standard in student friendly language, tell them to find an object in their home, and then ask them to apply the terms to that object in whatever format they prefer.
It’s okay for eLearning lessons (introducing new material) to be spread out over the course of two or three days. We can use the time in between to meet with students and provide feedback.
WHAT ABOUT STUDENTS WHO DON’T HAVE WIFI?
Remote learning is not always online learning. Some students don’t have regular access to technology and wifi at home. Of course, that makes it more challenging to check in on them, to provide feedback, and to be responsive to learning goals.
In that case, maybe it is better to simplify. Have students simply read for pleasure, write in response to reading, and practice the skills and strategies you’ve been teaching them all year. They can still relate their reading and writing to the real world and to authentic audiences.
We can still support parents by providing them with tips to help their students enjoy learning at home and with a recommended schedule to balance study, play, exercise, and family time.
And, since not all students have equal access to books, it’s imperative that we SEND KIDS HOME WITH BOOKS TO READ.
Trying to figure out how to get books and materials to students? Many districts are using their existing bus routes to drop off textbooks and other learning tools. Others are mailing materials.
Above all, the biggest thing to keep in mind with remote learning is that students always have unique circumstances. We don’t know what is happening at home. What is their study space like? Who is helping them? Are they well-fed and loved? So, it’s critical that we are responsive, flexible, and compassionate.
Finally, we have to give ourselves some grace. For many, this may be the first time we are implementing remote learning. We have a big learning curve, and we can embrace it by not stressing when things don’t work out as planned. We are always learning.
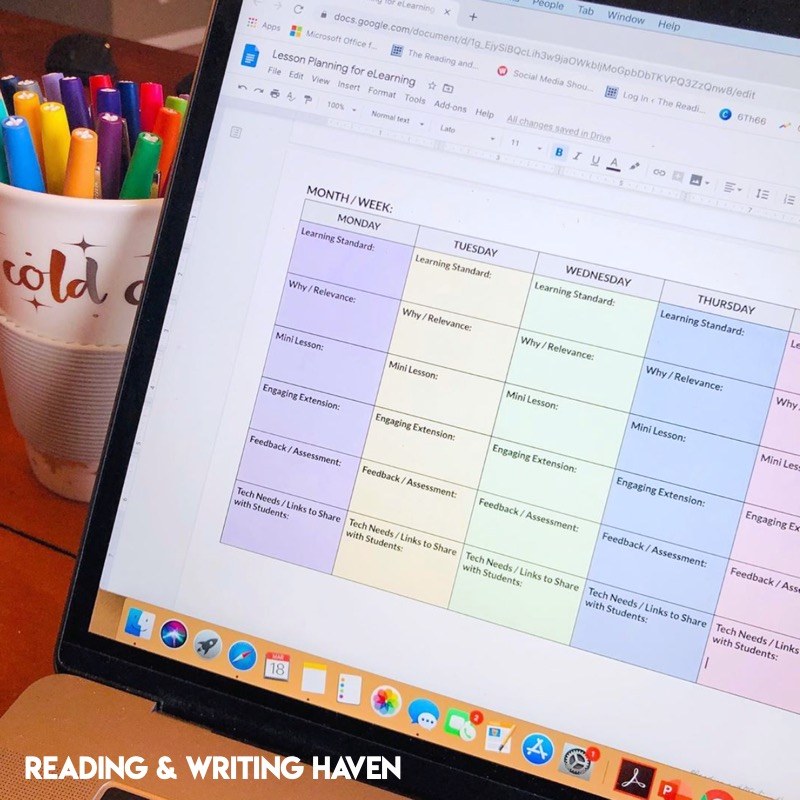
Ready to get organized?
Fill out this form to grab a free digital lesson planning doc for remote learning.
MORE DISTANCE LEARNING RESOURCES
-
TIPS FOR ORGANIZING ONLINE LEARNING
-
3 DIGITAL SKILLS TO MODEL IN SECONDARY
-
12 WAYS TO BUILD A VIRTUAL CLASSROOM COMMUNITY
-
THE BEST TIPS FOR EFFECTIVE REMOTE LEARNING
-
CLICK HERE TO ACCESS A FREE eLEARNING RESOURCE LIBRARY

